How to use 7-Zip on Windows: Explorer shortcuts, extraction habits, and File Manager power moves
Hands-on guideWalkthroughs below target a freshly installed build on a standard Windows desktop profile. Localized labels may differ, yet the underlying verbs (Add, Extract, Test) stay consistent.
Package files straight from File Explorer
- Highlight a single asset, a multi-select batch, or a whole directory tree you want frozen.
- Open the context menu, drill into 7-Zip, and launch Add to archive… so the advanced dialog appears.
- Choose between 7z, zip, or other writers, layer optional AES passwords, and nudge the compression slider toward speed or density depending on tonight’s SLA.
- Press OK; by default the finished archive lands next to the sources unless you pointed the path elsewhere.
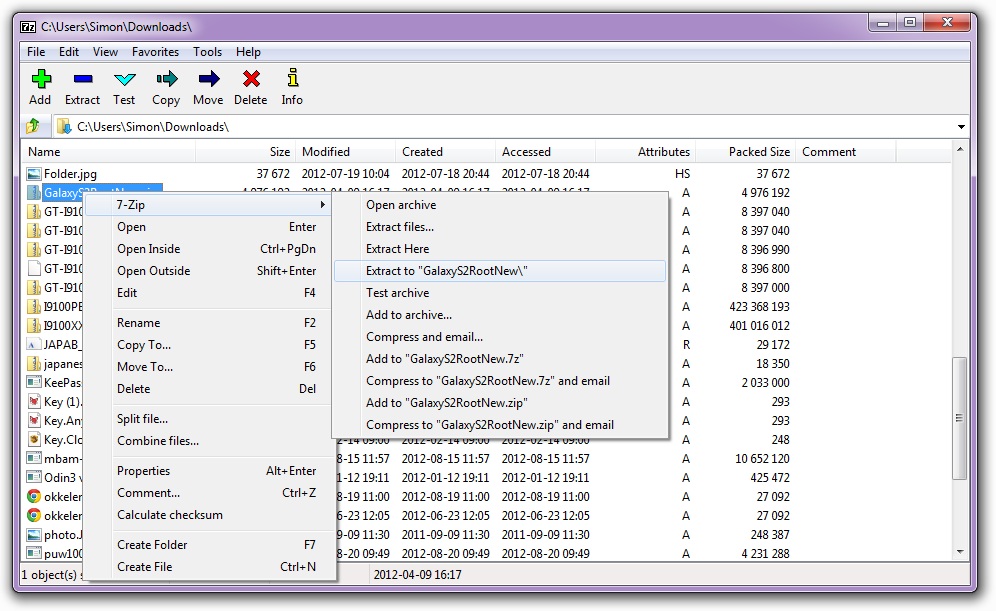
Recover files from a download or attachment
- Right-click the incoming archive wherever it landed (Downloads, Teams cache, USB stick).
- Pick 7-Zip → Extract to “FolderName\” when you want a tidy subfolder, or Extract here when the working directory is already correct.
- Supply passwords the sender provided; the UI blocks until decryption succeeds, which protects you from half-written extracts.
Operate the standalone File Manager
Pin 7-Zip File Manager from the Start menu for tasks that feel cramped inside Explorer alone. The window pairs a path bar with dual-style browsing so you can dive inside nested archives, preview sizes, drag partial restores, and trigger toolbar actions without reopening context menus.
Quality-of-life habits power users adopt
- Stage massive extractions on NVMe or SSD volumes with headroom—temporary scratch files can balloon past the final extracted size.
- When collaborators mix macOS/Linux receivers, keep a ZIP lane for compatibility even if internal backups stay in 7z.
- Delay shredding originals until a peer machine or cloud sandbox has successfully reopened the archive and spot-checked critical binaries.